Setting up a self-hosted supergraph
Host your enterprise router in your own infrastructure
⚠️ Important: If you're just getting started with GraphOS, instead create a cloud supergraph.
Self-hosted supergraphs are an enterprise-only feature for organizations with advanced performance or compliance requirements.
If your organization might benefit from the expanded features of an Enterprise plan, please get in touch with us!
This tutorial helps you get you up and running with GraphOS and a self-hosted supergraph. You can complete this tutorial even if your organization doesn't currently have an Enterprise plan, enabling you to test out this functionality.
Supergraph concepts
Before we get started, let's quickly cover what a self-hosted supergraph is.
A supergraph combines multiple GraphQL APIs into a single unified GraphQL service. The individual APIs in a supergraph are called subgraphs:
A separate service called the router sits in front of your subgraphs and provides the publicly accessible endpoint for your supergraph. Clients query the router, which distributes each query across the appropriate combination of subgraphs and returns the combined result.
The router uses a special GraphQL schema called the supergraph schema. This schema incorporates the types and fields in each subgraph schema, along with metadata that enables the router to correctly distribute queries across subgraphs.
A self-hosted supergraph is a supergraph with a router that you host and manage in your own infrastructure. This is in contrast to a cloud supergraph, which uses a router that's hosted and managed by Apollo.
We'll cover these concepts in more detail as we proceed through the steps below.
1. Set up Apollo tools
This quickstart uses the following Apollo tools:
- Apollo Studio. This is the primary web interface for GraphOS. Studio helps you monitor, manage, and collaborate on your supergraph.
- The Rover CLI. This is the primary command-line interface for GraphOS. Rover helps you interact with your graphs and their schemas.
Let's set these up first.
Create an Apollo account
To manage our supergraph with GraphOS, we need an Apollo account. Let's create one if you don't have one yet.
Complete the first step of Get started with GraphOS (Create your Apollo account), then return here.
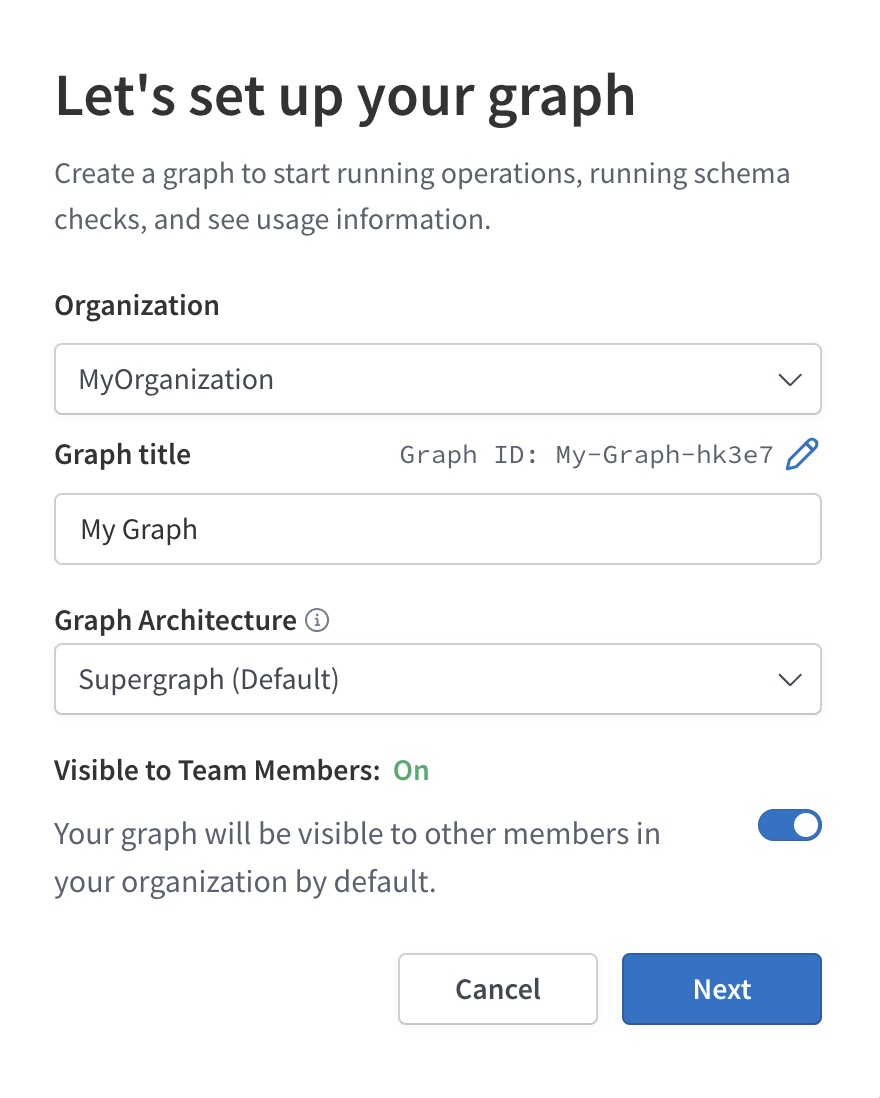
Create a graph in Apollo Studio
After you create your Apollo account, create your first graph in Apollo Studio by following the instructions for your organization's plan type:
If you just created your organization as part of creating your account, it's on a Serverless plan type.


Install the Rover CLI
Rover is Apollo's CLI for managing all kinds of graphs, including subgraphs and supergraphs. We'll use it throughout this quickstart.
Even if you already have Rover installed, you should update your version now by completing this step.
Install the latest Rover release with the appropriate command for your system:
curl -sSL https://rover.apollo.dev/nix/latest | sh
iwr 'https://rover.apollo.dev/win/latest' | iex
After installing, run rover in your terminal with no arguments to confirm that it installed successfully. Verify that the printed version number matches the latest full release (if it doesn't, you might need to manually delete a previous outdated installation).
Authenticate Rover with GraphOS
We'll use Rover to publish our subgraph schemas to GraphOS. To do that, we first need to authenticate Rover with GraphOS.
Complete the first two steps of Configuring Rover (Obtain an API key and Provide the API key to Rover), then return here.
2. Create a router project directory
With a self-hosted supergraph, you're responsible for deploying and managing your supergraph's router. The router provides the public endpoint that clients use to query your supergraph:
For this quickstart, we'll use some Apollo-hosted example services as our subgraphs, and we'll set up the Apollo Router in front of them. The Apollo Router is a high-performance, precompiled Rust executable that acts as the router for a supergraph.
On your development machine, first create a new directory for your router project. Then inside that directory, run the following to install the Apollo Router:
curl -sSL https://router.apollo.dev/download/nix/latest | sh
This installs the router executable in your project directory. Try running it with the following command:
./router
When you do, you'll get a startup error message like the following:
That's because we aren't currently providing a supergraph schema to the router! We'll fix that soon.
3. Obtain your subgraph schemas
This quickstart uses two Apollo-hosted subgraphs (named Locations and Reviews) from an imaginary space tourism application called FlyBy. Here are their URLs and schemas for reference:
If you have your own existing subgraphs that you want to use instead of these examples, feel free! Provide their names and URLs wherever you see the example subgraphs used in the steps below.
To compose a supergraph schema for our router, GraphOS needs the following information about each of our subgraphs:
- The subgraph's schema
- The URL of the subgraph's GraphQL endpoint (which must be accessible by the router)
Fortunately, we have all of this information! Let's collect it in our project.
Do the following in your router project's root directory:
Create a new file called
locations.graphqland paste the following schema into it:Create a new file called
reviews.graphqland paste the following schema into it:
💡 In most supergraphs, each subgraph schema lives in the codebase for its associated subgraph. Because we're using remotely-hosted example subgraphs in this quickstart, we're saving these subgraph schemas in our router project for convenience.
4. Publish your subgraph schemas
With our subgraph schemas ready, we now can use the Rover CLI's subgraph publish command to publish those schemas to GraphOS.
In Apollo Studio, click the graph you created back in the first step. Because we haven't published a schema to it yet, the following dialog appears:
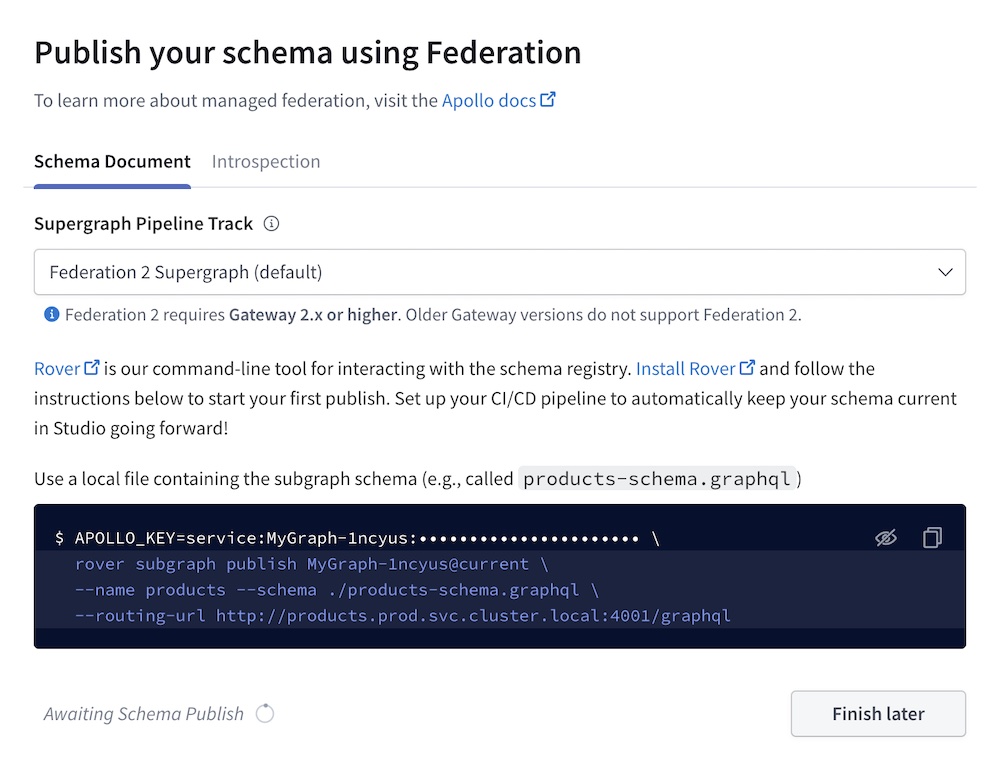
This dialog shows an example Rover command for publishing a subgraph schema. Copy that command and paste it into your text editor so we can modify it.
Edit the command like so:
- Change the value of the
--nameoption tolocations- This will be our first subgraph's name.
- Change the value of the
--schemaoption to./locations.graphql- This is the path to the schema for our Locations subgraph.
- Change the value of the
--routing-urloption to:https://flyby-locations-sub.herokuapp.com/- This is the URL that our router will use to communicate with the Locations subgraph.
When you're done, the command resembles the following:
APOLLO_KEY=<API_KEY> \rover subgraph publish <GRAPH_REF> \--name locations \--schema ./locations.graphql \--routing-url https://flyby-locations-sub.herokuapp.com/
Note that this command includes two custom values: an API key and a graph ref.
- Rover uses the API key to authenticate with GraphOS. The key's permissions are scoped to this particular graph, which means Rover can't use it to perform operations on any other graph.
- If you authenticated Rover with GraphOS earlier, you don't actually need to provide an API key to this command via
APOLLO_KEY(although it's fine to do so).
- If you authenticated Rover with GraphOS earlier, you don't actually need to provide an API key to this command via

When you're finished modifying the command, paste it into your terminal and run it from your router project's root directory.
If the command is successful, you'll see output like the following:
A new subgraph called 'locations' was created in 'docs-example-graph@main'The supergraph schema for 'docs-example-graph@main' was updated, composed from the updated 'locations' subgraph
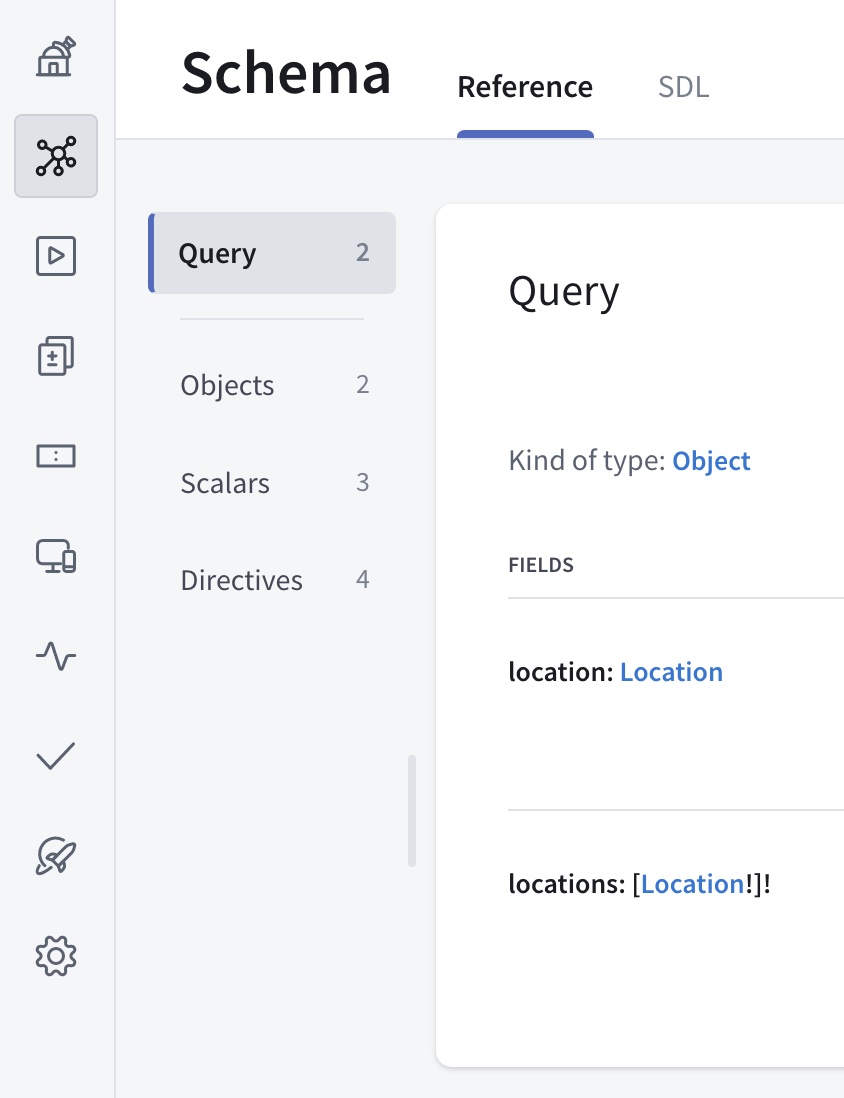
Nice! If you open your graph's details in Studio now, you'll see types and fields from our locations subgraph listed on the Schema page:
Next, let's do the same thing for our reviews subgraph, again substituting your graph ref:
APOLLO_KEY=<API_KEY> \rover subgraph publish <GRAPH_REF> \--routing-url https://flyby-reviews-sub.herokuapp.com/ \--schema ./reviews.graphql \--name reviews
You only need to provide a subgraph's --routing-url the first time you publish that subgraph's schema to a particular variant (unless you need to change that URL later).
If you refresh the Schema page in Studio, you'll now see types and fields from our reviews service as well.
Every time we publish a subgraph schema, GraphOS automatically composes all of our subgraph schemas into a supergraph schema! However, our router isn't yet fetching that schema from Apollo. We'll tackle that next.
5. Connect the router to GraphOS
It's time to enable our router to fetch its supergraph schema from GraphOS. To do that, we'll need a graph API key that we set as the value of an environment variable.
In theory, we could use the same API key that we just provided to the rover subgraph publish command. However, it's recommended practice to create a separate API key for each system that communicates with GraphOS. This reduces the impact whenever you need to replace an API key that might be compromised.
⚠️ API keys are secret credentials. Never share them outside your organization or commit them to version control. Delete and replace API keys that you believe are compromised.
Obtain a graph API key for your Studio graph by following these steps. If you have an Enterprise plan, set the API key's role to Contributor.
Make sure to copy and paste the API key's value somewhere so you can reference it (for security, API keys are not visible in Studio after creation).
Paste the following terminal command into your text editor so you can make changes to it:
APOLLO_KEY=your-api-key \APOLLO_GRAPH_REF=your-graph-id@your-variant \./router --devThen, make the following changes:
- Replace
your-api-keywith your graph API key. - Replace
your-graph-id@your-variantwith your variant's graph ref.- For a refresher on graph refs, see Step 4.
- Replace
Paste the edited command into your terminal and run it.
This time there's no error, and you'll see output similar to the following (timestamps omitted for brevity):
By providing an API key to the router, you also automatically enable operation metrics reporting to GraphOS, enabling you visualize your graph's performance. Learn more about metrics.
Optionally, to help you keep track of your router's environment variables, consider setting up a tool like direnv so you don't need to set the variables every time you run
./router.(Most cloud deployment environments provide a helpful way to set environment variables, so this issue is mostly limited to local development.)
Now that our router is running, we can quickly open our browser to localhost:4000 to explore our composed schema in Apollo Sandbox:
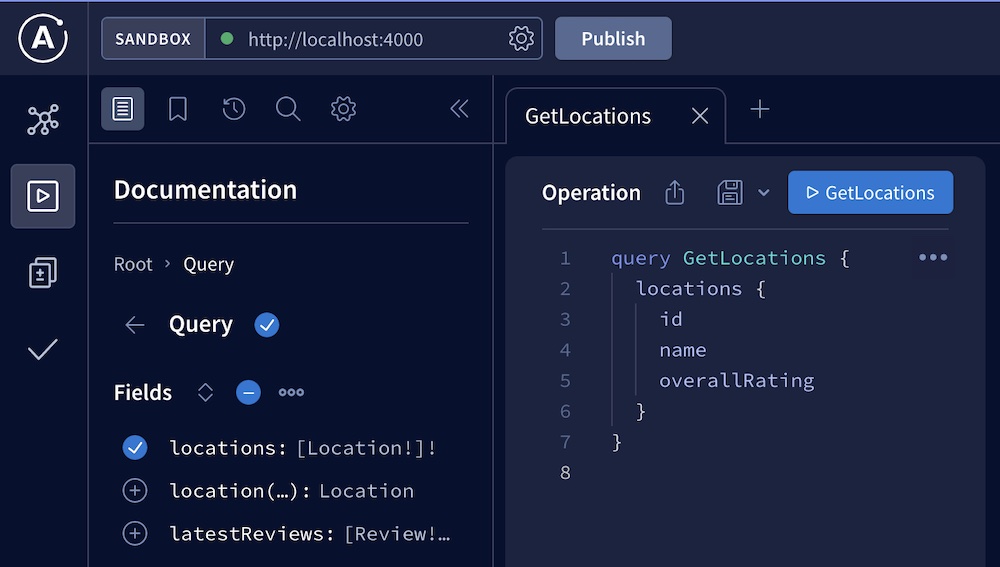
While we're here, execute some test queries against the supergraph! We'll look at metrics for those test queries in the next step.
6. View operation metrics
Because our router is connected to GraphOS, it automatically collects and reports metrics on incoming operations. You can then visualize those metrics in Studio.
Return to Apollo Studio and go to your supergraph variant's Operations page, which looks like this:
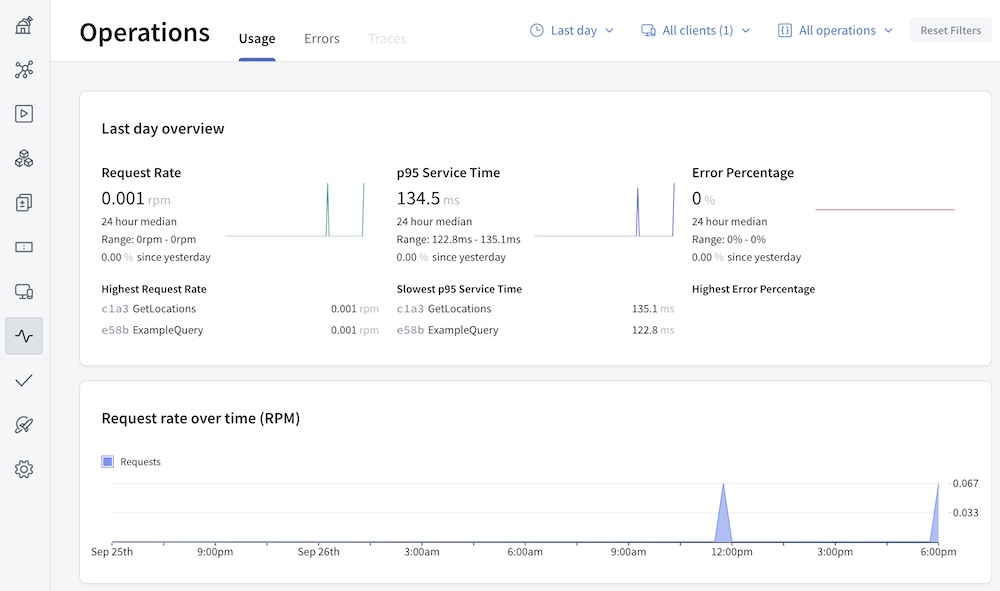
The test queries you executed in the previous step should already be represented on this page! (If they aren't there yet, check the page again in a few minutes.) After you update all of your clients to query your router, the Operations page becomes vital to monitoring your supergraph's performance.
7. Deploy your router and connect clients
Now that our router is running successfully in our development environment, we can deploy it to our preferred platform (AWS, Google Cloud, etc.) so clients can begin querying it!
The exact details for deploying the router depend on which platform you use, but these high-level steps hold true for most platforms:
Set the
APOLLO_KEYandAPOLLO_GRAPH_REFenvironment variables in the router's deployment environment, as we did locally in this step.- Most deployment platforms provide a mechanism for setting environment variables for a given application or container.
Make sure the Apollo Router executable is available to the application before it runs
routerto start up.The application can include the router download command as a pre-launch task:
curl -sSL https://router.apollo.dev/download/nix/latest | sh
If your platform expects the router to listen on a particular port, set this port in a YAML configuration file you include in the application's deployment bundle:
router-config.yamlsupergraph:# The socket address and port to listen onlisten: 127.0.0.1:4000# OR if the port is specified via environment variablelisten: 127.0.0.1:${env.PORT}You provide this config file to the router executable like so:
router --config router-config.yamlLearn more about router configuration options.
After you successfully deploy your router, it's ready to start receiving client operations! If you have any existing client applications that connect directly to your GraphQL API, you can update their GraphQL endpoint URL to your router's URL.
Similarly, any new client applications should use your router's URL.
⚠️ Important considerations:
- For browser-based clients, make sure their origin is allowed in your router's CORS rules, which you can set in the router's YAML configuration file.
- Only update clients that communicate with the correct instance of your GraphQL API! For example, if your API has staging and production instances, only update clients that communicate with the instance used by this supergraph variant.
Next steps
Nice work! We've registered two subgraph schemas with GraphOS, and we've set up a router that fetches its composed supergraph schema so it can execute operations across subgraphs.
If we now publish changes to one of our subgraph schemas, our running router automatically fetches the corresponding changes to the supergraph schema (assuming composition succeeds).
Next, we'll cover some of the most common and important actions to perform on your new supergraph, including:
- Updating subgraph schemas
- Adding another subgraph
- Setting up schema checks